Protecting online business is one of the top priorities for any business, and lots of businesses use WordPress nowadays.
You can make sure that your WordPress website is secure by following steps mentioned in this article.
1. Keep everything up to date
Login to your WordPress admin area.
Usually, you can use a link like https://your-website-here.com/wp-admin to log in to the admin panel unless you have used plugin(s) to hide it.
The login page looks something like this.
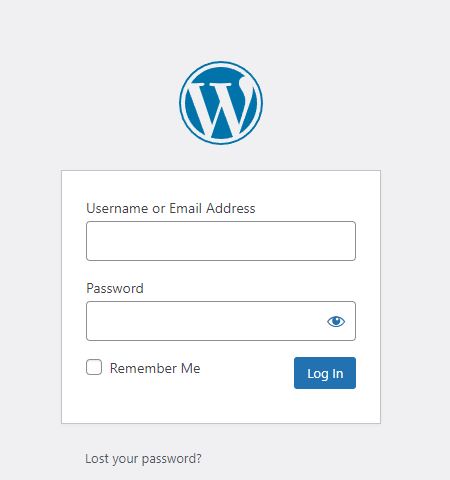
Enter the email or username and the password to log in.
Update WordPress installation, themes, and plugins.
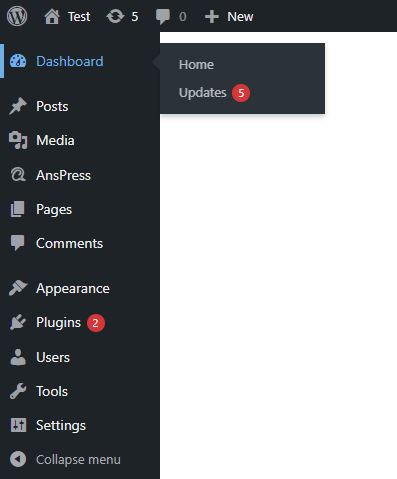
Hover over the left sidebar “dashboard” menu, it will show you the two options.
Home and updates, click on the updates option.
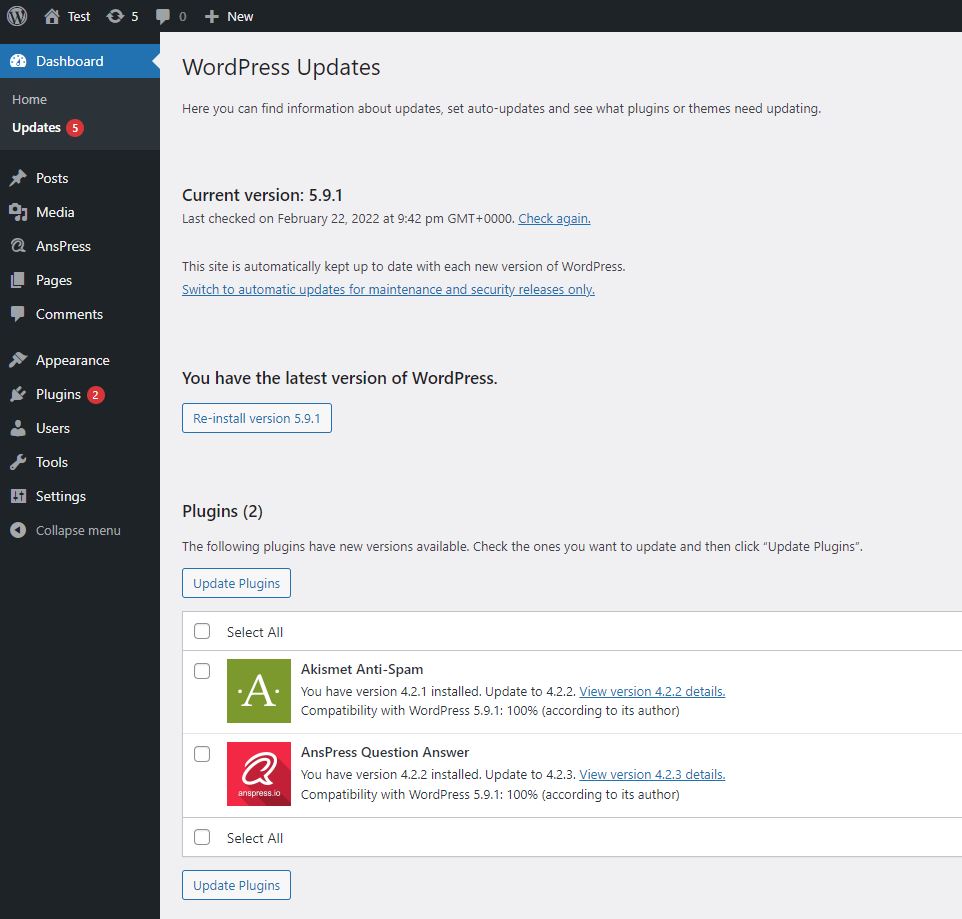
This page will show you the needed updates that you need to do for your WordPress website.

If your WordPress installation needs an update it will show you a message “An updated version of WordPress is available.” with a blue button to update your website.
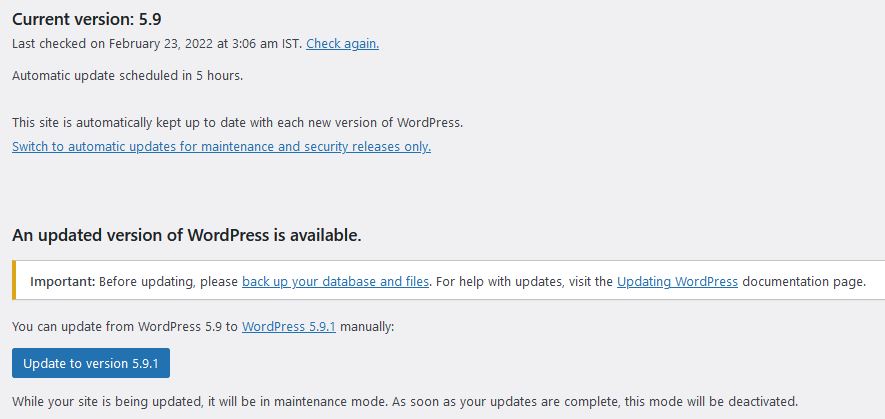
Click on the blue update button and it will update your WordPress website.
For plugins and themes, you can select themes and the plugins you would like to update with checkboxes and simply click on the Update themes or Updates plugins button.
By keeping everything up to date, you are securing your website from the found vulnerabilities in the code.
2. Change admin login page URL
WordPress is an open-source CMS, which means everyone knows where to log in as admin on your WordPress website.
Hiding the admin login page will help you to avoid online attacks on your website.
Login to your WordPress website as an admin.
On the left sidebar, click on plugins and then click on the “Add New” button.
Search for “WPS Hide Login”.
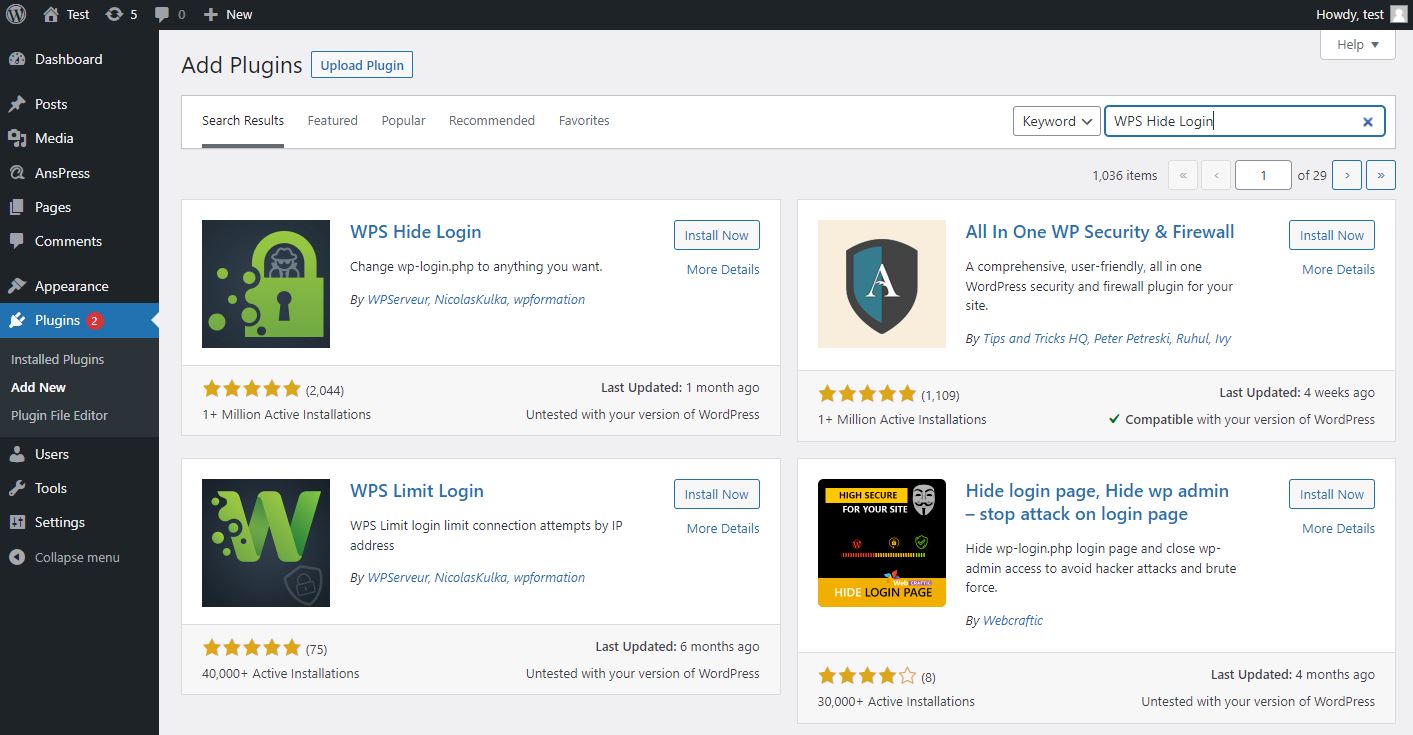
As you can see, it shows multiple plugins. Simply click on the Install now button for the WPS Hide Login plugin.
Once installed, click on the “activate” button to activate it.
Once activated, click on the “Settings” option which is on the left sidebar menu.
Scroll to the bottom and you will see a section for “WPS Hide Login”. This will allow you to set a custom login URL for admin as well as for the 404 page.
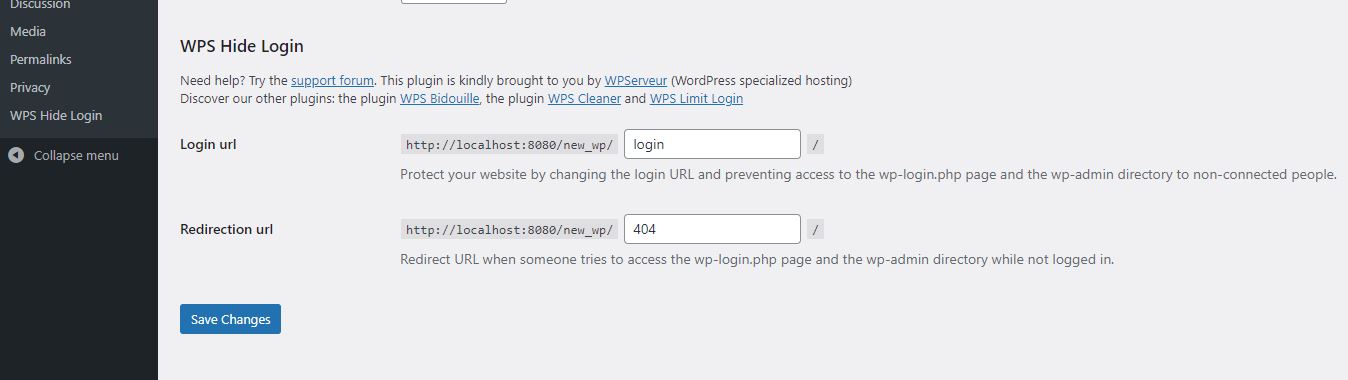
Type any URL you would like to have as admin login URL & 404 page URL, click on save changes, and next time when you login, you will need to use that URL to login as admin.
Hiding URL is not enough and to have it hidden 100%, you will have to disable XML-RPC which we also have covered in this article.
3. Disable REST API
In layman’s terms, REST (Representational state transfer) API is used to make all kinds of different software talk with each other.
Most of the time you do not need this feature for your WordPress website, this will help you to hide your website data including the data about the users.
In this article, we will use a plugin to do that, you also can achieve the same result without a plugin as well, for that click here.
Click on the “Plugins” option in the left sidebar and click on the “Add New” button.
Search for “disable rest API” to find the plugin.
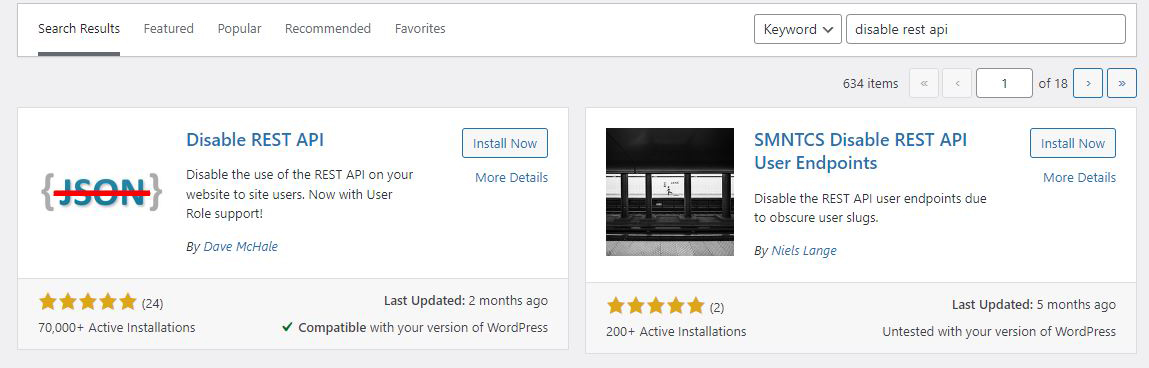
Click on the “Install Now” button for the “Disable REST API” plugin and activate it.
To manage it, click on the “Settings” from the left sidebar menu and then click on the “Disable REST API” option.
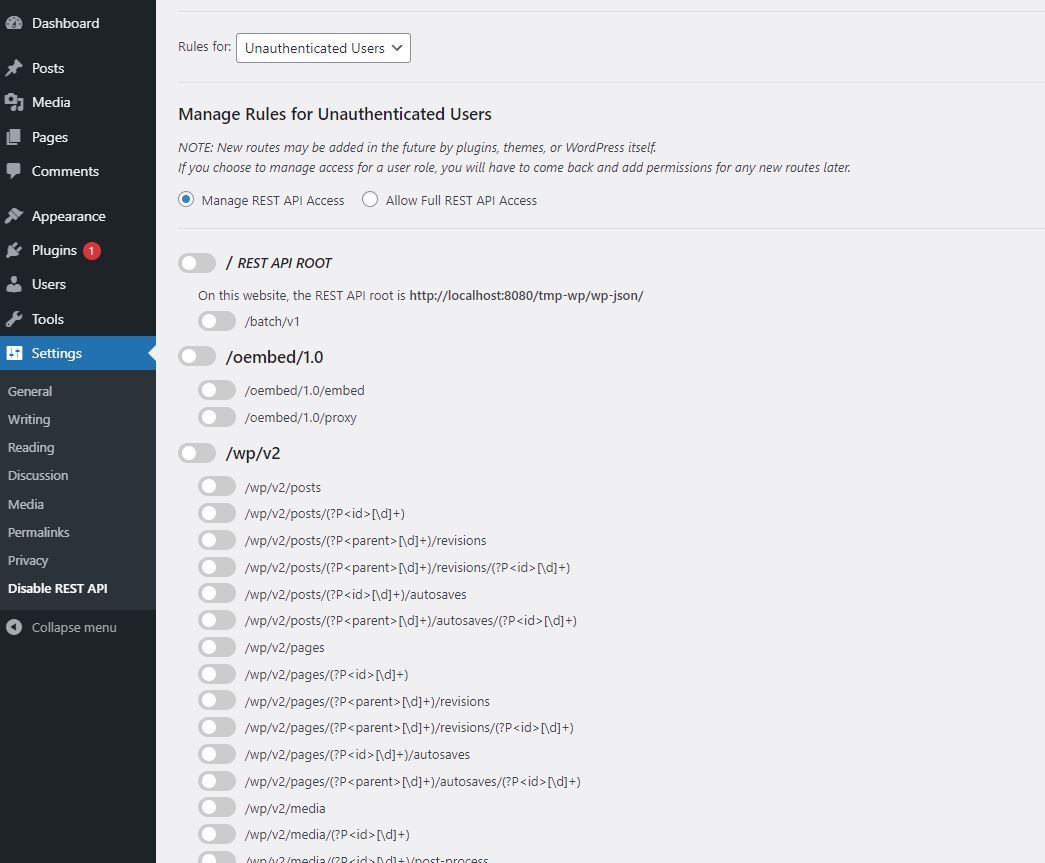
Here you can manage all API endpoints, disable as you need or you can disable the whole API.
4. Uninstall and delete themes and plugins that are not being used
Having plugins means more features and functionality on your website, but you never know if any of them has a vulnerability that can put your website at risk.
It is always recommended to disable and remove the themes and plugins which you/your website is not using, that way you reduce the risk.
For themes, click on “Appearance” and then “Themes” at the left sidebar menu.
Click on the theme you want to delete, and click on “delete” on the right bottom corner.
For plugins, click on “plugins” on the left sidebar menu.
It will show you a list of plugins that your website has, click on delete or deactivate and then delete the plugins that you do not use.
5. Disable XML-RPC
Even you hide your login page, the bots still can bombard HTTP requests to your login page via XML-RPC.
To avoid this, you will need to disable XML-RPC on your WordPress website.
In this article, we are disabling the xmlrpc.php file with server configuration, which is more reliable than any WordPress code.
Make an FTP connection with the server where your WordPress website is hosted and find the .htaccess file.
Open the .htaccess file with a text editor and copy and paste the code below in the file, keep this at the bottom as the file content.
<Files xmlrpc.php>
order deny,allow
deny from all
</Files>
This will help you to secure your WordPress website by not allowing anyone to access that file publicly from your server.
6. Disable file editing
WordPress has inbuilt code editing features inside the admin panel.
While it may be useful to some people, most people don’t use it and it makes a piece of cake to modify code on your server without any FTP or server access.
It is very easy to disable it, make an FTP connection to your server, find the wp-config.php file and open it with a text editor.
Paste the code line given below in that file on the new line, save the file, and upload.
define('DISALLOW_FILE_EDIT', true);This will help you to secure your WordPress website by not allowing anyone to edit the code via the admin panel.
7. Secure your WordPress website by limiting login attempts
We already have seen how to change the admin panel login URL, if someone finds the URL, he/she still may try a brute force attack.
by limiting the login attempts, it will make sure that no single person can attempt x numbers of login in y amount of the time.
This means better security and one more good thing is, you get notified for the failed attempts.
We will add a plugin to achieve this functionality, search for the term “Limit Login Attempts Reloaded” in the plugins area, install the plugin, and activate it.
Once activated, click on the “Settings” and then “Limit Login Attempts Reloaded” from the left sidebar, it will show you the page where you can do all settings for login limits.
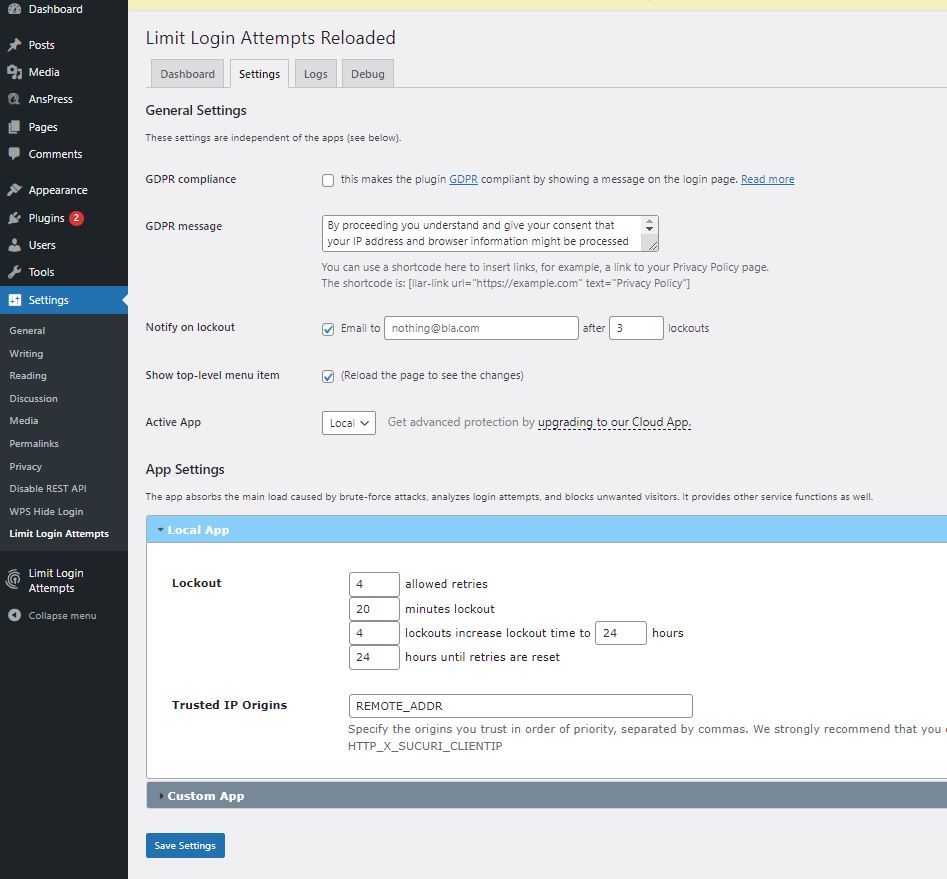
Set the settings and click on save settings to save them.
8. Improve security by adding two factor authentication
You can go one step ahead with the admin login and add two-factor authentication for admins.
Two-factor authentication is an extra layer of security to make sure that whoever logs in as the admin is the admin and not someone else.
One of the easiest ways to secure your WordPress website with two-factor authentication is, by using plugin and Google authenticator app which would show you an OTP to login with time intervals.
We already have a whole article here about it, feel free to click and follow it.
9. Logs
One of the ways you can find if someone broke into the website is, to view logs.
Having logs helps administrators to keep an eye on almost everything that happens inside the WordPress website.
We are going to use a plugin to achieve this functionality.
Click on plugins, click on the “Add New” button and search for “WP Activity Log”, install the plugin and activate it. It is from WP White Security.
Once activated, it will let you set settings with a wizard, it is pretty easy to do so.
Now, you have a new menu item in the sidebar “WP Activity Log”, click on it and it will show you the logs.
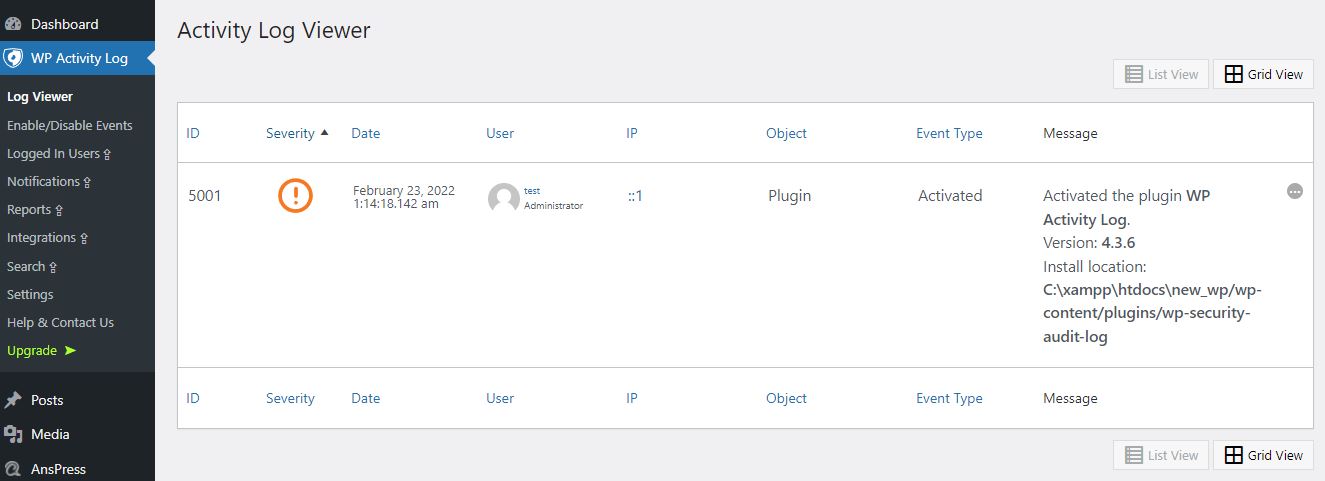
These logs will help you to keep an eye on everything.
10. Security plugin
One of the ways to secure a WordPress website is by using a security plugin.
A security plugin will help you to scan your website for any malicious files, would detect vulnerabilities, and as well as would have threat assessment features.
You do not require a security plugin, but this is something extra that helps you to harden your website security to the next level.
Security plugins come with features such as Login page hardening, Database security, and as well as a firewall for your WordPress website.
There are two most popular plugins out there, Sucuri & Wordfence.
It is recommended not to use both the same time or multiple security plugins at the same time and doing so may cause issues with your website.
You may install & activate any one of the security plugins the same way as any other plugin for WordPress.
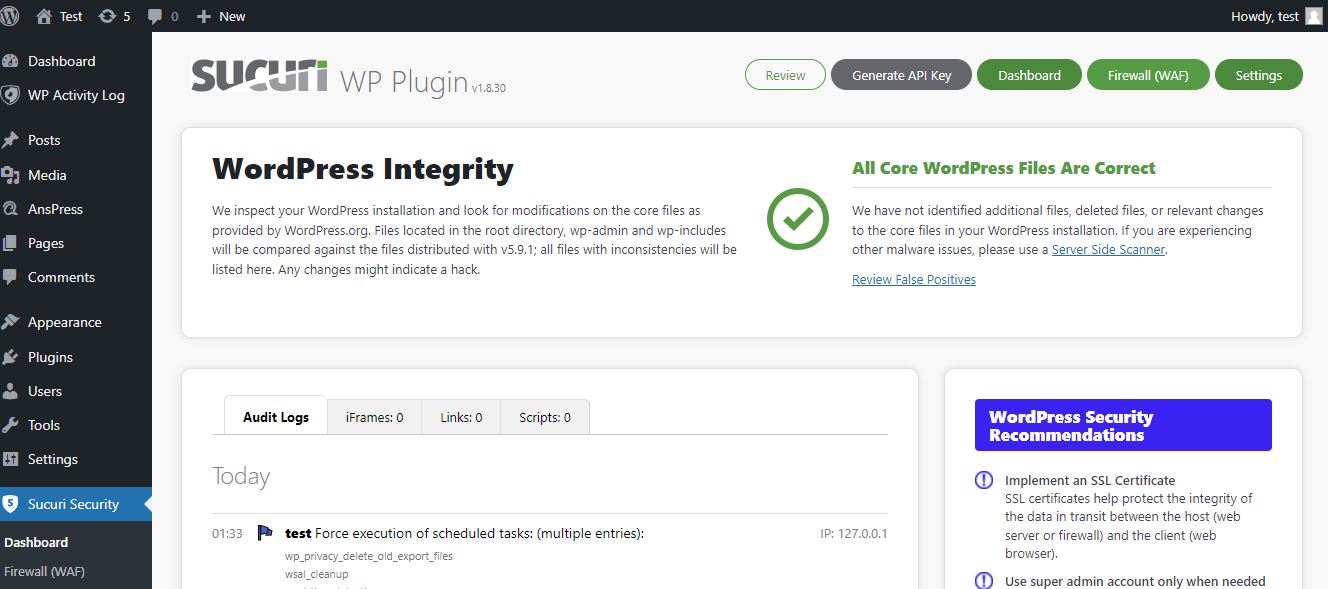
This is what Sucuri’s dashboard looks like.
As there are multiple security plugins out there that have multiple features, we can’t recommend just one option here.
More, if your programmer had implemented good security already, you may not need a security plugin altogether.
Remember, these security plugins also have paid versions and require you as a site owner to have interaction.
11. Changing the display name
This is a very small setting that can save you from big headaches, especially if you are not using the login limits plugin or hiding your login page.
Most bots and attackers try your display name to log in as admin on your website, you can have two different names, one to display and one to log in.
It is pretty easy to do, click on the “Users” from the left sidebar menu, click on “edit” for the user you want to edit.

As you can see here, I have added a Nickname, I can easily set my nickname as the display name.
Click on the update profile button to save the changes.
This will help you to secure your WordPress website by hiding your real username when you write articles or on your website’s public pages & posts.
12. HTTPS
Most of the websites nowadays are using HTTPS.
When you visit a website, if there is a lock sign beside the website’s name, that means it is using HTTPS instead of HTTP.
HTTPS makes sure that the connection is secure, encrypted, can not be intercepted nor can be tempered by the attackers.
Nowadays, you even can get SSL certificates that make your website use HTTPS for free.
Lots of hosting providers use certificates from Let’s Encrypt to provide HTTPS on shared servers, if you have Cpanel, you can find the settings for it and it would generate and set up SSL certificates for you.
If you are running your website on cloud hosting, such as DigitalOcean, you can use Certbot to generate and renew SSL certificates.
As it depends on the hosting you are using, there is not a single answer to how you can set up HTTPS on your website.
If you do not know much about this, contact your hosting provider and they will be able to guide you in the correct direction, or simply, just contact us.
13. Disable Directory Indexing and Browsing
This is what it shows when you have not disabled the directory indexing on your website.
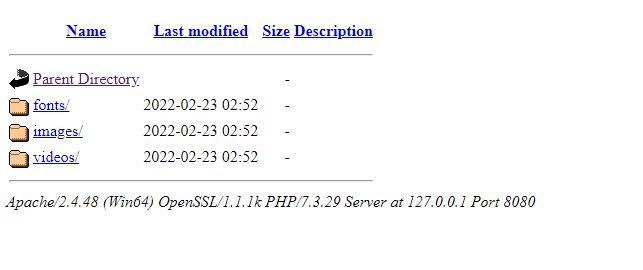
If the server directory doesn’t have the index.html or index.php page, it would list all files and directories.
This means an attacker would have an easier time finding your files and vulnerabilities.
Disabling this will harden your website security and it is pretty easy to do.
Make an FTP connection to your hosting server, browse the root directory of your website and open the .htaccess file in a text editor.
Copy and paste the code below at the new line and at the bottom of the file contents.
Options -IndexesSave the file and upload.
By doing so, it will no longer show all files and directories even if the index.html or index.php file doesn’t exist.
14. Use CloudFlare
No, we are not paid by them, we genuinely like the service and we recommend it to everyone.
It is simply no brainer to use it because of multiple reasons,
It improves your website speed, makes DNS changes faster, helps you to manage your website DNS in a single place, acts as CDN with cached pages,
and more importantly for this article, protects your website from DDoS attacks.
You will need to signup on to the Cloudflare website, change your DNS to point to them, and then you can use the service to point to the actual servers. Cloudflare sits beside your actual server and the DNS.
We do not recommend changing DNS if you are not a tech-savvy person because changing those settings incorrectly can cause your website to go down.
You can either research about it to do it yourself or hire someone to set it all up for you, as the DNS topic itself is a big topic to cover, we can’t put everything in this article.
15. Update the PHP
PHP is a programming language and WordPress is written in PHP. So, it uses PHP as the core language.
As you need to keep your WordPress updated, the same should be done for PHP as well, sadly there is no single button that you can press like WordPress updates to update the PHP.
This boils down to what kind of hosting you are using, for shared servers, usually, you can not update PHP by yourself and you would have to depend on the hosting company.
But, if you are using a VPS or cloud hosting, you can do it yourself with commands, here is one of the good articles you can refer to.
Please note that with time the commands may change or because of software updates it could be a bit different than now when you read this article.
So, it is better to just contact your hosting provider in a shared server case or simply contact someone to manage your server for you if you are not a tech-savvy person.
Bonus: Do not use shared hosting
Shared hosting means there are multiple websites stored on the same server. The actual problem is, you do not have control over other websites.
If your provider doesn’t have good security placed in and attackers manage to get one website, it can put your websites at risk too even if you do everything to secure your websites.
You can avoid this issue by using VPS or cloud hosting.
Hope you liked the ultimate guide about how to secure a WordPress website, let us know in the comments if we missed something!

Did not know most of these points, thank you for sharing this!
I always visit this article whenever I need to check security of my WordPress blog.
Thank you.
Good article.
This website is my inspiration , real excellent layout and perfect written content.
Excellent blog you have here.. It’s difficult to find high-quality writing like yours nowadays.
I truly appreciate individuals like you! Take care!!
Thank you 🙂